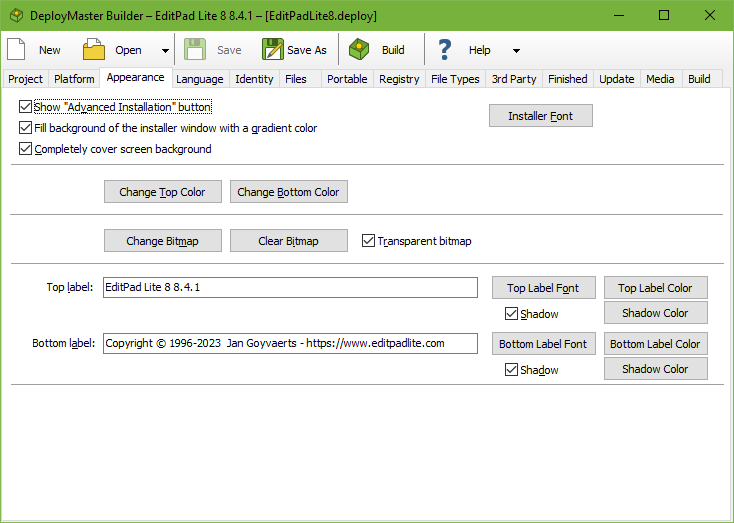
Change the looks of your installation package on the Appearance page.
Show Advanced Installation button should always be on, except if you are sure that your setup packages will only be used by novices, who would be needlessly confused if they selected this option. If you disable this option, the end user will not be able to choose between installing for all users or for the current user or pick different installation folders or select which file associations can be created.
You can choose if you want to fill the background of the installer window with a gradient color or not. The gradient fill provides a nice visual effect.
Click the Installer Font button to select the font that should be used by the installation program. The font is not included in the setup program. You should select a font that is already present on the user’s systems. Fonts that are part of Windows include Tahoma, Arial, and Courier New. If you plan to create a setup program in a language other than English, make sure to select the proper script when selecting the font. You can find the script option in the lower right corner of the font selection screen.
The Completely cover screen background checkbox determines whether your installation program will cover the whole screen or not. This gives your installation software the gradient-filled background that has become typical for installation software on the Windows platform. It does not serve any purpose, other that its visual effect. When you check this option, several options for defining the looks of the background appear:
Change Top Color: Click this button to show up a color selection dialog box in which you can pick the color of the top of the background.
Change Bottom Color: Same story, but for the bottom color. The background is painted using a vertical, linear gradient fill.
Change Bitmap: Click this button if you want to display a bitmap in the top left corner of the background. This bitmap could typically be an application or company logo. Click Clear bitmap to get rid of it.
Transparent Bitmap: Mark this checkbox if you want the background bitmap to be transparent. The color of the lower-left pixel of the bitmap will be used as the background color. Wherever the bitmap’s pixels have this color, the background will shine through. If the lower-left pixel does not have the appropriate color, use a paint program to add one row of pixels at the bottom of the image using the desired background color.
Top label: Text to be displayed at the top of the background. This is typically the name of the application the user is installing. If you want the label to span across more than one line, hit Ctrl+Enter to insert a line break while typing in the text.
Top label font: Shows a font selection dialog box for the top label.
Top label color: Since the standard Windows font selection dialog box allows you to choose between 16 basic colors only, you can click this button to select any color you would like for the top label.
Shadow: Mark this checkbox to paint a shadow behind the top label.
Shadow Color: Select a color for the top label’s shadow.
The same options are available for the bottom label. This could typically be a company slogan, motto or copyright statement. It is probably also a good idea to mention your product or company URL in one of the labels.